One of the most common tactics for increasing traffic is building an email list. When done correctly, it’s a great way to grow a loyal following you can message directly. In this Tutorial you’ll learn to track email optin users and add content personalization.
There are countless email optin tools at your disposal, from free plugins to SaaS solutions with advanced functionality. The right solution depends on a number of factors, but most tend to have common features – Integration with an email provider, such as MailChimp or SalesForce, and the ability to customize the experience.
While Logic Hop is “solution independent”, we are using the Bloom Email Optin plugin. Bloom integrates with MailChimp, works well with our parent theme Divi and is already included with Elegant Themes.
Our Bloom solution was near perfect – Easy integration and great layouts. The challenge, by default, Bloom doesn’t provide redirects. Not ones to give up, we developed a simple plugin that enables post-submit redirects. (Download it for free) With our Bloom redirect functionality in place, we’re off to the races.
Goals to Track Email Optin Users
Make no mistake, capturing an email is a big deal. But once you’ve got it, how do you engage the user on your site?
Redirecting them to a Thank You page is a good start. You can show custom messaging and provide additional content such as downloads, but after that, there’s not much aside from sending emails.
Most email optin plugins set a cookie so the user won’t see the optin form again, but other than hiding the form, there’s not much benefit when the user returns to your site. With Logic Hop you can trigger a Goal that allows you to track email optin users and personalize content every time they visit your site.
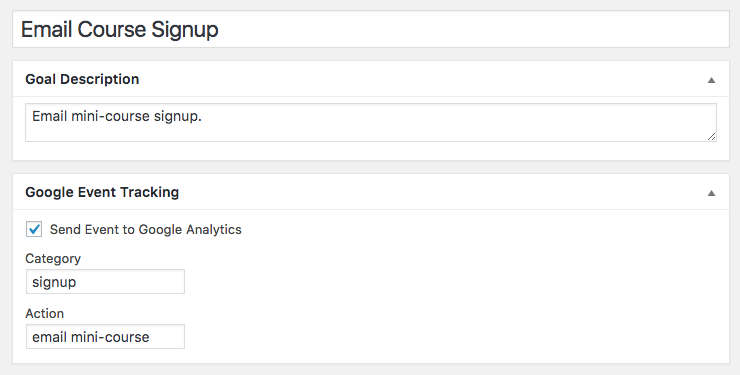
Creating a Logic Hop Goal is simple, give it a name and add a description. For our Goal we took the additional step of sending the Event to Google Analytics. Now, we have the Goal status available to track individual users and we have Event data stored in Google Analytics.
The next step was even easier – On our Thank You page we simply selected our Email Course Signup Goal under the “Set Goal on Page Load” option.
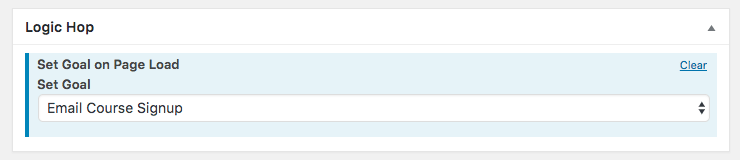
When a user completes the optin form, they’re redirected to our Thank You page. The Email Course Signup Goal is set and the Event is sent to Google Analytics.
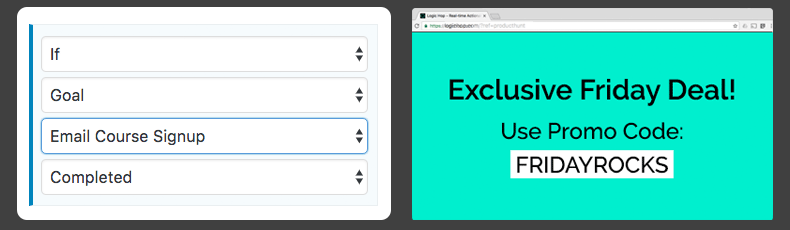
With the Goal set, we can track email optin users and use Logic Hop Conditions to personalize content during their visit. A simple Condition would be to check if the Goal has been set.
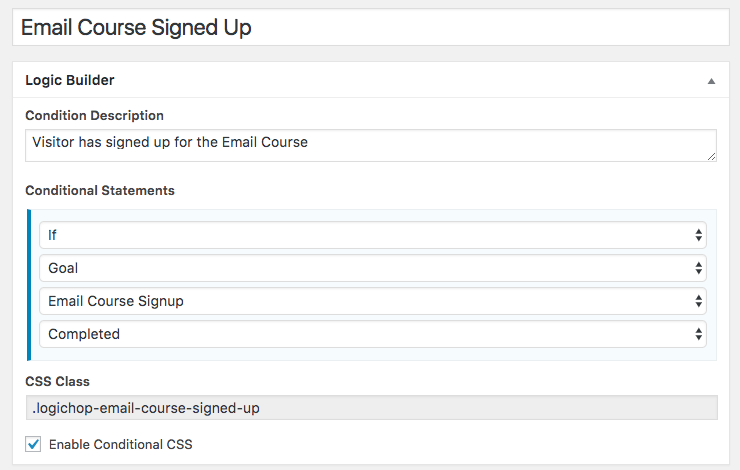
In this example we’ve enabled Conditional CSS allowing us to wrap any content in an HTML element with the class .logichop-email-course-signed-up or .logichop-not-email-course-signed-up. This first class will display the element if the user has signed up, the second will display the element if the user has not signed up.
See it in action below:
Boo – You haven’t signed up for our email course.
You’ll get more great tutorials like this one! Complete the form below to signup.
[et_bloom_inline optin_id=”optin_2″]
Woo Hoo – You’ve already signed up for our email mini-course!
You rock! Perhaps it’s time to signup for a free two-week Logic Hop trial? You know, kick the tires, see how you like it…
Supercharge your marketing with content personalization.
Not sure if content personalization is right for you? Get a free, custom personalization plan.

